


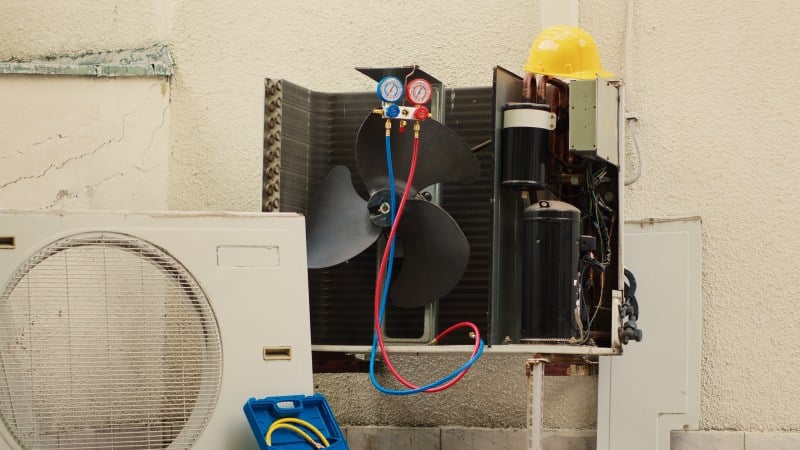
S.O.S. AC Not Cooling: Quick DIY Checks to Perform First
When your air conditioning system fails to deliver the cool comfort you expect, it’s natural to feel frustrated. However, many common issues can be resolved with a few simple DIY checks before you need to call a professional. We recommend starting with the most straightforward culprits: your thermostat settings, power supply, air filters, and airflow through your ducts and registers. Addressing these first can often restore your AC’s cooling performance quickly and efficiently.
S.O.S. AC Not Cooling Due to Thermostat and Power Glitches
The thermostat is the brain of your AC system, and often, a simple oversight here can lead to cooling problems. First, confirm your thermostat is set to “Cool” mode, not “Heat” or “Fan Only.” Ensure the temperature setting is several degrees below the current indoor temperature. If the fan is set to “ON” instead of “AUTO,” it will run continuously, circulating air but not necessarily cooling it, which can mask a cooling issue. Dead batteries in a digital thermostat can also prevent it from communicating correctly with your AC unit, so check and replace them if needed.
Next, investigate the power supply. Air conditioning systems typically have two dedicated circuit breakers: one for the indoor air handler and another for the outdoor condenser unit. Check your electrical panel for any tripped breakers and reset them. If a breaker trips repeatedly, do not keep resetting it, as this indicates a more serious electrical fault. Also, locate the outdoor disconnect switch near your condenser unit and ensure it’s in the “ON” position. Some older units might have a pull-out fuse block here; check if the fuses are blown and replace them with the same amperage rating if necessary. For a more detailed guide on initial troubleshooting steps when your AC isn’t cooling, consider consulting resources that walk you through these essential first checks, such as those found in an S.O.S. AC not cooling guide.
Airflow Restrictions and Clogged Filter Inspection
Restricted airflow is one of the most prevalent reasons an AC unit struggles to cool. Your system relies on a consistent flow of air to operate efficiently. The easiest and most impactful check is your air filter. A dirty or clogged air filter severely impedes airflow, forcing your AC to work harder, reducing its cooling capacity, and potentially leading to a frozen evaporator coil. We recommend checking your air filter monthly, especially during peak cooling season (May through October), and replacing it every 30 to 90 days, or more frequently if you have pets or allergies. In heavy use areas, standard 1-inch filters can clog in 3-4 weeks. If you cannot see light through your filter when held up, it’s time for a replacement.
Beyond the filter, ensure all supply registers and return grilles inside your home are open and unobstructed. Furniture, curtains, or even area rugs can block vents, preventing cool air from circulating properly. Contrary to popular belief, closing vents in unused rooms can actually restrict overall system airflow, increasing static pressure and making your AC work harder and less efficiently. Make sure doors to rooms are also open to facilitate proper air return.
Inspecting the Outdoor Condenser and Indoor Coils
Once you’ve ruled out basic thermostat and airflow issues, the next step involves inspecting the two main components responsible for heat transfer: the outdoor condenser unit and the indoor evaporator coil. Both require proper airflow and cleanliness to effectively absorb and release heat, ensuring your home stays cool. Blockages or ice accumulation on either coil can severely impair your AC’s performance.
Outdoor Condenser Clearance and Cleaning Methods
The outdoor condenser unit is where your AC releases the heat absorbed from inside your home. If this unit is blocked or dirty, it can’t dissipate heat effectively, leading to reduced cooling and increased strain on the compressor. Inspect the area around your condenser unit, ensuring there’s at least 2 feet of clearance on all sides and 5 feet above. Remove any leaves, grass clippings, weeds, or other debris that may have accumulated.
The condenser fins, the thin metal slats surrounding the unit, can also get clogged with dirt and debris. Before cleaning, always turn off the power to the unit at the outdoor disconnect switch or the main breaker. Once power is off, you can gently spray the condenser fins with a garden hose from the inside out to remove accumulated grime. Do not use a pressure washer, as the strong water force can damage or bend the thin fins. If you notice bent fins, a specialized fin comb can be used to gently straighten them, improving airflow. Regular cleaning of your condenser coils, ideally two to three times per cooling season, is a best practice for maintaining efficiency.
Identifying and Defrosting a Frozen Evaporator Coil
A common and frustrating issue is a frozen evaporator coil, which is behind roughly 30% of ‘AC not cooling’ calls. The evaporator coil, located inside your indoor air handler, absorbs heat from your home’s air. If it’s covered in ice, it can’t absorb heat, and your AC will blow warm or barely cool air. Signs of a frozen coil include frost buildup on the refrigerant lines, reduced airflow from vents, and even water pooling around the indoor unit as the ice melts.
A frozen coil is typically caused by restricted airflow (often a dirty air filter), low refrigerant levels, or a malfunctioning blower fan. If you suspect a frozen coil, immediately turn off your AC system at the thermostat. Switch the fan setting to “ON” (not “Auto”) to help melt the ice faster. Allow the coil to thaw completely, which can take 2 to 4 hours. Place towels around the unit to catch any meltwater. Once thawed, replace your air filter if it’s dirty, and check that all vents are open. If the coil refreezes after these steps, it likely points to a more complex issue like a refrigerant leak or a mechanical problem requiring professional attention. Ensure your condensate drain line, which removes moisture from the system, is not clogged, as this can also contribute to freezing.
Major Mechanical and Refrigerant Failures
While many AC problems can be resolved with DIY efforts, some issues delve into the complex internal workings of your system, involving sealed refrigerant lines, intricate electrical controls, or major mechanical components. These often require specialized tools, training, and EPA certification to diagnose and repair safely and effectively.
Signs of Refrigerant Leaks and Phase-Down Regulations
Refrigerant is the lifeblood of your AC system, circulating through the coils to absorb and release heat. Unlike automotive AC systems, your home AC does not “consume” refrigerant; it’s a closed system. Therefore, low refrigerant levels always indicate a leak. Signs of a refrigerant leak include a noticeable decrease in cooling performance, hissing sounds from the unit, ice formation on the evaporator coil (as mentioned earlier), and unusually high energy bills.
Addressing refrigerant leaks is not a DIY task. It requires an EPA-certified technician to locate and repair the leak before recharging the system. As of October 2026, the HVAC industry continues to navigate the phase-down of hydrofluorocarbon (HFC) refrigerants like R-410A under the EPA’s AIM Act. Older systems using R-22 (Freon) have faced even stricter regulations, with production ceased since January 2020, making it extremely expensive and difficult to obtain. New equipment manufactured after January 1, 2025, primarily uses lower-GWP alternatives like R-454B, which is a mildly flammable (A2L) refrigerant. This evolving landscape means that if your system has a significant refrigerant leak, especially an older R-22 unit, replacement might be a more cost-effective and environmentally responsible option than repair.
S.O.S. AC Not Cooling from Compressor and Electrical Component Failures
Beyond refrigerant, the compressor and various electrical components are critical for your AC’s operation. The compressor, located in the outdoor unit, is responsible for circulating refrigerant. If it fails, your AC won’t cool at all. Signs of a failing compressor can include the outdoor unit humming but not starting, loud screeching or grinding noises, or the unit tripping the circuit breaker frequently.
Other electrical components can also cause cooling failures. A common culprit is a failing run capacitor in the outdoor unit. This component provides the necessary electrical boost to start the compressor and condenser fan motor. If it’s weak or failed, the motors may hum but not start, or only one component (e.g., the fan but not the compressor) might run. Another component, the contactor, acts as a relay, sending power to the compressor and fan. Pitting or burnt contacts on the contactor can prevent power from reaching these essential components.
Diagnosing these electrical issues safely requires specialized tools like a multimeter and expertise. Attempting to test or replace these parts without proper knowledge can be dangerous due due to high voltage. If your outdoor unit isn’t running or is making unusual noises, and you’ve already checked the breakers and disconnect switch, it’s time to call a professional.
AC Troubleshooting and Repair Decision Guide
Deciding whether to attempt a DIY fix or call a professional can be challenging. We’ve compiled a guide to help you assess common AC cooling problems, their symptoms, potential DIY solutions, and when professional intervention is necessary. This can also help you understand the estimated repair costs, which can influence your decision to repair or consider replacement.
Problem Category Symptoms Common DIY Fixes When to Call a Pro Thermostat Issues AC not turning on/off, wrong temperature Check settings, replace batteries, reset thermostat Thermostat non-responsive, faulty wiring Airflow Restrictions Weak airflow, warm air, frozen coil Replace dirty filter, unblock vents/returns Persistent freezing, duct leaks/blockages Outdoor Unit (Condenser) Unit not running, dirty, warm air, reduced cooling Clear debris, gently hose clean fins, check disconnect Unit hums but doesn’t start, fan not spinning, loud noises Indoor Unit (Evaporator) Frozen coil, water leaks Thaw coil, check condensate drain for clogs Repeated freezing, refrigerant leak suspected Refrigerant Issues Poor cooling, hissing, ice on lines None (professional only) Any suspected leak, low refrigerant levels Electrical Issues AC not starting, tripping breakers Reset breaker, check disconnect switch/fuses Repeated breaker trips, component failure (capacitor/contactor) Mechanical Failure Loud noises, unit not cooling at all None (professional only) Compressor failure, fan motor issues When considering repair costs, it’s important to weigh them against the age and overall condition of your system.
Most central air conditioners last 10-15 years with proper maintenance. If your unit is over 10 years old and facing a major repair, such as a compressor replacement, it’s often more cost-effective long-term to consider a full system replacement. The “50-percent rule” suggests that if the cost of repairs exceeds 50% of the cost of a new unit, replacement is the wiser investment. Modern units are significantly more energy-efficient, offering substantial savings on utility bills over their lifespan, making replacement an attractive option for older, less efficient systems.
Frequently Asked Questions About AC Cooling Failures
We often encounter similar questions from homeowners experiencing AC cooling problems. Here, we address some of the most common inquiries to provide clarity and guidance.
Why is my AC running continuously but the house stays warm?
If your AC runs non-stop but fails to cool your home adequately, it’s a clear sign of an underlying issue. This continuous operation often indicates that the system is struggling to reach the thermostat’s set temperature. Common reasons include an undersized AC unit for your home’s square footage, especially during extreme heat; significant duct leakage allowing cool air to escape into unconditioned spaces; or severe heat gain through poor insulation or leaky windows. Dirty coils (both evaporator and condenser) can also drastically reduce efficiency, making the unit run longer to achieve minimal cooling. In such cases, the AC is fighting a losing battle against heat, leading to high energy bills and discomfort.
Should I turn off my air conditioner if it is not blowing cold air?
Yes, if your AC is running but not blowing cold air, we strongly recommend turning it off. Continuing to run a malfunctioning unit can exacerbate the problem and lead to more costly repairs. For instance, if the evaporator coil is freezing due to restricted airflow or low refrigerant, running the system will only cause more ice buildup, potentially damaging the compressor. Running a unit that isn’t cooling also wastes energy and puts unnecessary strain on components, increasing the risk of overheating and premature failure. It’s always best to shut it down, perform initial troubleshooting steps, and if the issue persists, call a professional.
How do I reset a central air conditioning system?
Resetting your AC system can sometimes resolve minor glitches, much like restarting a computer. Here’s how to do it safely:
- Turn off your thermostat: Switch your thermostat to the “OFF” position.
- Cut power at the breaker: Go to your electrical panel and locate the circuit breaker(s) for your AC system (usually labeled “AC,” “Furnace,” or “Air Handler” for the indoor unit, and “Condenser” for the outdoor unit). Flip them to the “OFF” position.
- Wait: Leave the power off for at least 5 minutes. This allows the system’s internal components to fully discharge and reset.
- Restore power: Flip the circuit breaker(s) back to the “ON” position.
- Restart thermostat: Return to your thermostat and set it to “Cool” mode with your desired temperature.
- Wait for startup: Your AC system typically has a built-in delay (often 3-5 minutes) before the outdoor unit kicks in to protect the compressor. Allow this time for the system to cycle back on.
If the system still doesn’t cool after a reset, it indicates a more persistent problem that requires further investigation.
Conclusion
Understanding why your AC isn’t cooling properly can save you from discomfort, high energy bills, and unnecessary repair costs. By systematically checking your thermostat, power supply, air filters, and both indoor and outdoor units, you can often identify and resolve minor issues yourself. However, it’s equally important to recognize when a problem extends beyond DIY capabilities and requires the expertise of a professional HVAC technician. Issues like refrigerant leaks, compressor failures, or persistent electrical problems demand specialized knowledge and tools.
Prevention is always better than cure. Performing routine maintenance, such as annual AC tune-ups, checking air filters monthly, and keeping your outdoor unit clear of debris, can significantly extend your system’s longevity and ensure it runs efficiently for years to come. Don’t wait for a complete breakdown; addressing small issues promptly can prevent them from becoming major headaches. With this ultimate checklist, you’re now better equipped to diagnose and address your AC cooling problems, ensuring your home remains a comfortable sanctuary, even on the hottest days.
