


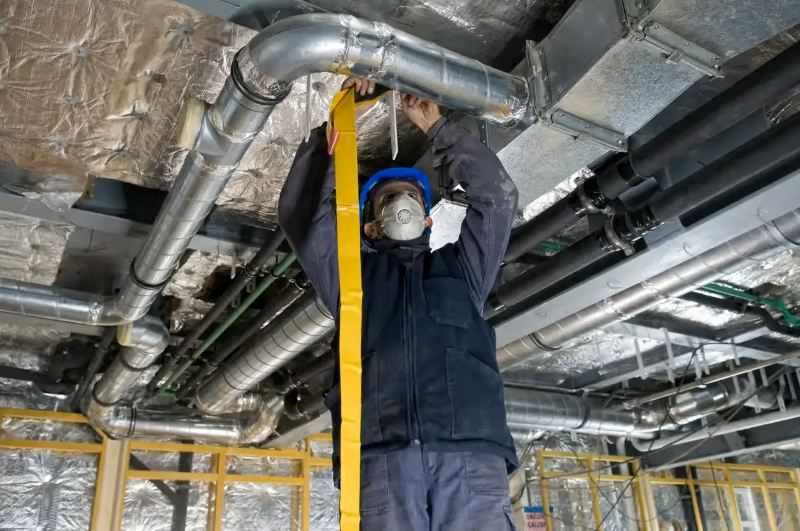
Replacing an air conditioner can improve home comfort and reduce energy waste. However, a new unit still depends on the ducts that carry cooled air into each room.
Leaky, damaged, or poorly sized ducts can leave rooms warm even when the AC works correctly. A ductwork evaluation during AC replacement helps identify these problems before installation.
This guide explains how HVAC professionals inspect ductwork, measure airflow, and decide whether repairs or replacement make sense. If you are considering expert AC and heating services, these checks can help you ask better questions about the work.
How Existing Ductwork Affects AC Performance
Your duct system delivers cooled air and carries return air back to the equipment. Leaks and restrictions can reduce comfort, increase operating costs, and affect the new system’s performance.
Static Pressure and Restricted Airflow
Static pressure measures resistance to airflow. Undersized ducts, crushed flexible sections, dirty filters, and restrictive return grilles can increase that resistance.
High pressure may reduce airflow through the equipment and into rooms. A contractor can measure it with a manometer and compare the result with the equipment’s requirements.
The measurement should lead to a diagnosis, not an automatic duct replacement. For instance, a dirty filter or blocked return grille may create a restriction that is easier to correct.
If your current system struggles to cool the house, start with an AC not cooling properly checklist. It can help distinguish basic troubleshooting issues from problems that need professional testing.
Signs of Aging or Damaged Ducts
Ducts can deteriorate in attics, basements, and crawl spaces. Common problems include loose joints, torn insulation, rust, crushed flexible ducts, and damage from pests or moisture.
Air may escape through gaps, while damaged insulation allows unwanted heat transfer. The duct system’s condition matters more than its age alone.
Connections deserve particular attention. Heating and cooling cycles can loosen older joints. Pests or accidental movement may damage ducts hidden in unfinished spaces. A contractor should inspect these defects before recommending a full replacement.
Common Duct Materials and Their Weak Points
| Material | Characteristics | What to inspect |
|---|---|---|
| Galvanized steel | Rigid and durable | Rust, joints, and air leaks |
| Aluminum | Lightweight and corrosion-resistant | Dents and loose connections |
| Fiberglass duct board | Lightweight insulated panels | Moisture and surface damage |
| Flexible duct | Adaptable and often insulated | Kinks, compression, and tears |
| Fiberboard | Dense duct material | Moisture damage and sealing |
These materials do not have one reliable replacement age. Installation quality, exposure, and inspection findings should guide the decision.
Matching Equipment Size to the Duct System
A contractor should assess the home’s cooling load before selecting replacement equipment. A Manual J calculation considers factors such as windows, insulation, house size, and local climate.
Equipment selection alone is not enough. The ducts must deliver the required airflow without excessive resistance. ACCA Manual D provides guidance for residential duct design and sizing.
This matters in older homes where insulation, windows, and room layouts may have changed. See our guide to practical improvements for older homes for related upgrades.
What Happens During a Professional Ductwork Evaluation?
Technicians start by examining accessible ducts in attics, crawl spaces, basements, and utility areas. They look for crushed runs, disconnected joints, damaged insulation, and sharp bends that restrict airflow.
Visual checks reveal obvious defects. Measurements help determine whether the ducts can support the replacement AC.
Not every home needs every test listed below. The contractor should choose tests based on symptoms, system design, and access to the ducts. Ask which measurements are included in the inspection quote.
Four Tests That Help Identify Duct Problems
- Static pressure measurement: A manometer checks airflow resistance. High readings may point to restrictive ducts, filters, coils, or return pathways.
- Duct leakage test: Pressurization equipment measures air escaping through joints and openings. The contractor uses the results to assess sealing needs.
- Blower airflow measurement: Airflow is measured in cubic feet per minute (CFM). The result helps show whether the equipment receives suitable airflow.
- Supply and return assessment: The contractor checks plenums, grilles, and return-air pathways for restrictions or poor distribution.
Each measurement answers a different question. Low airflow, for example, does not automatically mean every duct needs replacement.
A leakage test may identify gaps that can be sealed. A pressure test may uncover a restriction. Airflow readings can show whether the equipment and ducts work together. A reliable assessment uses these findings to explain the repair.
How Professionals Interpret the Results
The technician should compare measurements with the proposed equipment’s specifications. A pressure reading without context does not establish the cause of a problem.
If one bedroom stays warm, the issue may be a leaking branch duct or a blocked return pathway. Repairing that section could be more appropriate than replacing the entire duct network.
The technician should inspect the affected room’s supply and return paths. They may then compare airflow with other rooms. This gives the homeowner a specific explanation instead of a general claim that the ducts are old.
Some contractors use procedures informed by ANSI/ACCA 310 to evaluate installation quality. These may include airflow, leakage, and blower-power measurements. The tests used depend on the project.
What to Ask for in the Inspection Report
A useful report should explain the findings and proposed repairs in plain language. Before approving work, request:
- Photos or descriptions of damaged or disconnected duct sections.
- Available airflow, static pressure, and leakage test results.
- An explanation of any sizing or return-air restrictions.
- A clear repair scope, with reasons for replacement where proposed.
- A plan to verify system performance after installation.
This information makes it easier to compare estimates and identify work that the measurements support.
Should You Seal, Repair, or Replace the Ductwork?
Not every duct problem requires a full replacement. Small leaks and loose joints may respond to sealing or targeted repairs. Severe physical damage or major sizing problems may require new duct sections.
Technicians may use mastic or suitable HVAC-rated sealing products. Damaged insulation also needs attention. Sealing a duct does not correct every airflow restriction.
Some repairs are straightforward, such as reconnecting a loose section. Others may involve redesigning a return-air pathway. Where contractors find suspected mold or major moisture damage, the source of moisture also needs attention.
Duct Sealing vs. Replacement
| Condition | Likely approach | Reason |
|---|---|---|
| Small leaks or loose joints | Seal or reconnect | The duct itself remains sound |
| Damaged insulation | Repair insulation | Reduces unwanted heat transfer |
| Crushed or torn sections | Replace affected sections | Restores the airflow pathway |
| Severely undersized layout | Evaluate redesign | Sealing cannot correct poor sizing |
| Extensive damage | Consider wider replacement | Repairs may not address the system’s condition |
Warning Signs Homeowners May Notice
- Uneven temperatures: Some rooms stay warmer or cooler than others.
- Weak airflow: Little air reaches one or more supply vents.
- Excess dust: Leaky return ducts may draw particles from unconditioned spaces.
- Whistling or rattling: Air restrictions or loose parts may cause noise.
- Visible damage: Crushed flexible ducts, torn insulation, or disconnected joints need attention.
- Musty odors: Moisture problems warrant inspection before repairs proceed.
These symptoms can have more than one cause. A contractor should test the system rather than assume the ducts need replacing.
Ask for separate costs for sealing, targeted repairs, and full replacement when more than one option is practical. Compare the scope of work and planned testing, not only the final price.
How Duct Repairs Affect Comfort and Energy Costs
Leaky ducts can waste cooled air, particularly when they run through hot attics or crawl spaces. ENERGY STAR’s duct-sealing guidance explains how leaks and poor connections affect home comfort and energy use.
Sealing leaks and correcting restrictions may help reduce uneven temperatures. These repairs can also limit dust entering through return-air leaks and reduce noise from loose ducts.
Insulation matters when ducts pass through unconditioned spaces. Even sealed ducts can gain unwanted heat in a hot attic. A technician should check insulation damage separately from air leakage.
Better airflow supports equipment operation, but savings vary by home. Do not assume a specific reduction in utility bills without measurements. Our guide to practical ways to reduce home utility costs covers other household improvements.
Equipment Reliability and Warranty Considerations
Severe airflow restrictions may cause equipment to operate outside the manufacturer’s requirements. That can affect reliability and could complicate warranty claims if improper installation causes a failure.
Older ducts do not automatically void a new AC warranty. Ask the installer to document airflow and pressure checks. Professional work can prevent the problems discussed in our guide to why DIY HVAC fixes can cause bigger problems.
What Should Be Checked After AC Installation?
Installation should end with a performance check, not just a working thermostat. The contractor should confirm that the new AC and ductwork operate together as intended.
- Check airflow and static pressure against the equipment’s specifications.
- Inspect repaired joints and accessible duct connections.
- Confirm that supply and return pathways remain clear.
- Review room comfort and investigate persistent hot or cold spots.
- Record relevant test results for future maintenance.
Request a short explanation of what was tested and whether further adjustments are needed.
Frequently Asked Questions About Ductwork Evaluation
How long does a ductwork evaluation take?
The time depends on the home’s size, duct accessibility, and tests required. A visual inspection may be relatively quick. Leakage and airflow measurements take longer. Ask the contractor what the quoted inspection includes.
Can old ductwork affect a new AC warranty?
Age alone does not void a warranty. Problems may arise if restricted or damaged ducts cause the equipment to operate outside manufacturer specifications. Review the actual warranty terms and installation requirements.
Does a high-efficiency AC fix poor ductwork?
No. A more efficient unit can still struggle with air leaks and restrictive duct runs. The installer must check that the duct system can move enough air for the new equipment.
Can a contractor fix only the damaged ducts?
Often, yes. If most ducts are sound, the contractor may seal joints or replace individual sections. Major sizing problems or widespread deterioration may require a larger project.
How much energy can leaking ducts waste?
Losses vary with duct condition and location. Leaks into unconditioned areas can increase cooling costs. Testing gives a better picture of the problem than a general percentage estimate.
Final Takeaway: Check Ductwork Before Replacing the AC
A new air conditioner performs better when the ducts can deliver the airflow it needs. Inspecting the existing system helps find leaks, restrictions, and damaged insulation before installation.
Use the test results to decide whether sealing, targeted repairs, or replacement makes sense. A clear assessment protects your budget and supports more consistent home comfort.
